- Prepare the Ingredients

Measure out 1 cup of dried soybeans. Pick through them to remove any stones or debris. You will also need 4 cups of water for soaking and 4 cups for blending, plus optional salt and sweetener.
- Soak the Soybeans
Place the beans in a large bowl and cover with 4 cups of cool water. They will expand significantly. Let them soak for 8-12 hours, or overnight. Drain and rinse the plump beans thoroughly.
- Blend with Fresh Water
Add the soaked beans and 4 cups of fresh water to a high-speed blender. Blend on high for 2-3 minutes until completely smooth and frothy. The mixture will be thick and pale.
- Strain the Milk
Place a nut milk bag or a very fine-mesh sieve lined with cheesecloth over a large pot. Pour the blended mixture into the bag/sieve. Gather the edges and squeeze firmly to extract all the liquid, leaving the dry okara (pulp) behind.
- Cook the Milk
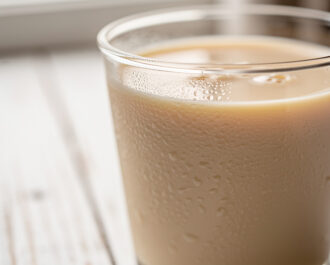
Place the pot with the strained milk over medium heat. Bring to a gentle boil, stirring occasionally to prevent scorching. Once boiling, reduce heat and simmer for 15-20 minutes, skimming off any foam. Stir in the optional salt. Let cool before adding any sweetener.

- Calories:120 kcal
- Protein:10 g
- Carbohydrates:8 g
- Sugar:2 g
- Salt:0.1 g
- Energy:502 kJ
- Fat:5 g
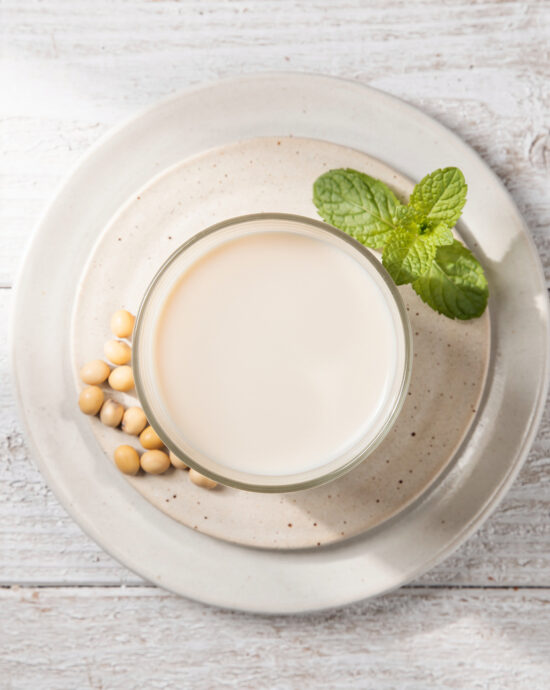
There’s something quietly magical about the ritual of making a soya drink from scratch. I used to grab the carton, but one taste of the earthy, creamy elixir from my friend’s kitchen—a humble, frothy glass poured from an old pot—changed everything. It had a freshness and a soulful nuttiness that no supermarket version could match. That memory sparked a mission: to reclaim the simple art of this nourishing brew. If you’ve ever wondered how to make soya bean milk that tastes as pure as it looks, you’re in the right spot. Let’s get back to basics.
The Humble History of This Soya Drink
This tradition goes back centuries in China, where it began as a thrifty way to use the whole soybean. It wasn’t fancy health food; it was daily sustenance, a warm, comforting staple sipped by emperors and farmers alike. The process—soak, grind, boil—is a meditation in simplicity, and the payoff is a beverage that’s both profoundly satisfying and incredibly versatile.
Why Your Own Homemade Soy Milk Wins
What makes this homemade soy milk special? Control. You control the sweetness, the thickness, and the purity. The result is a velvety texture with a clean, beany flavor that’s deeply satisfying, not chalky or artificially vanilla’d. It’s soy milk with no added sugar unless you say so, and it’s proudly vegan by its very nature. This condiment, or rather, this staple, becomes a blank canvas for your morning routine.
The One Pro-Tip You Absolutely Need
Here’s the game-changer: don’t rush the soak. Giving your beans a full 8-12 hours in cool water isn’t just a suggestion; it’s the secret to a creamy yield and easier blending. Skimp here, and you’ll fight your blender. A proper soak means the beans surrender their goodness willingly, resulting in a smoother milk and less pulp. It’s the quiet, waiting part of the process that does the heavy lifting.
Beyond the Glass: Serving Your Soya Drink
Of course, it’s glorious hot in a mug with a drizzle of maple syrup. But think bigger. Pour it chilled over granola, use it as the base for a dairy-free béchamel, or steam it for a latte that has real character. It pairs beautifully with a flaky pastry or a bowl of congee, cutting through richness with its clean finish.
Variations, Swaps & Your Soy Milk Machine
The beauty of this formula is its flexibility. For a soy milk recipe Chinese-style, add a pandan leaf during the boil for a sublime floral note. Sweeten with dates for a caramel depth. If you own a soy milk maker, follow its soy milk maker recipe guide for a hands-off approach. For an instant pot soy milk method, pressure cook the soaked beans with water before blending—it’s a fantastic shortcut. A Vitamix soy milk will be incredibly smooth due to the powerful motor. Whether you make soy milk at home with a nut milk bag or a dedicated machine, the principle is the same: transform simple beans into something splendid.
Make-Ahead & Keeping It Fresh
This mixture keeps beautifully. Let it cool completely, then store it in a clean jar in the fridge for up to 4 days. It will separate—that’s natural! Just give it a vigorous shake. I don’t recommend freezing, as it can become grainy. For the best flavor, I make a batch to enjoy over a few mornings.
Your Soya Drink Questions, Answered
Is homemade soy milk vegan? Absolutely. It’s just beans and water, making soy milk vegan and plant-based by default.
Why is my soy milk not creamy? The likely culprit is the bean-to-water ratio. Use more beans for a richer drink, or less water. Also, ensure you’re blending them thoroughly.
Can I flavor it during cooking? Yes! Add a cinnamon stick, a slice of ginger, or a vanilla bean pod to the pot while it simmers for an infused flavor.
So there you have it. Making your own soy milk isn’t just about the final product; it’s about connecting with a timeless process. It’s a small, rewarding act of kitchen alchemy. I promise, once you taste that warm, custom-made cup, the carton will forever pale in comparison. Now, go soak some beans. And when you’re looking for more culinary inspiration, don’t forget to browse our recipe collection or check out the fantastic resources at Serious Eats.