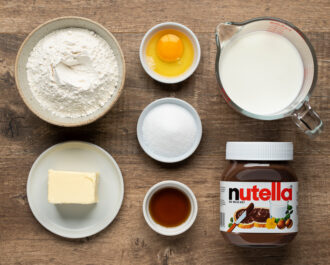
- Prepare the Ingredients

Gather all your ingredients: 1 cup gluten-free flour, 1 tbsp sugar, 1/4 tsp salt, 2 large eggs, 1 1/4 cups milk, 2 tbsp melted butter, 1 tsp vanilla extract, 2 tbsp cooking butter, and 3/4 cup Nutella. This ensures a smooth, organized cooking process.
- Make & Rest the Batter
In a blender, combine the flour, sugar, salt, eggs, milk, melted butter, and vanilla. Blend on high for 30-45 seconds until completely smooth and free of lumps. Pour the batter into a bowl, cover, and let it rest at room temperature for at least 30 minutes (or refrigerate overnight).
- Cook the Crepes
Heat a 9-inch non-stick skillet or crepe pan over medium heat. Add a small dab of butter and swirl to coat. Pour a scant 1/4 cup of batter into the center, immediately tilting and swirling the pan to spread it into a thin, even circle. Cook for about 60-90 seconds until the edges look dry and the bottom is lightly golden.
- Flip, Fill & Serve
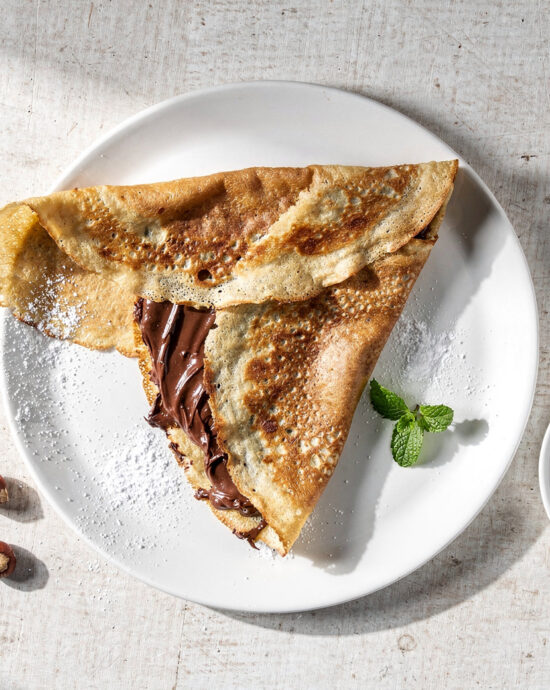
Carefully slide a thin spatula under the crepe and flip it. Cook for another 20-30 seconds on the second side. Transfer to a plate. While still warm, spread 1-2 tablespoons of Nutella over half the crepe. Fold it in half, then in half again to form a triangle. Serve immediately.
- Calories:245 kcal
- Protein:6 g
- Carbohydrates:28 g
- Sugar:15 g
- Salt:0.1 g
- Energy:1025 kJ
- Fat:12 g
There’s a kind of kitchen alchemy that happens when you whip up a good nutella crepe recipe. It’s less about following a rigid formula and more about embracing a bit of magic. The gentle sizzle of batter hitting a warm pan, the intoxicating scent of toasted hazelnuts and chocolate filling the air, and that glorious moment when you roll up a warm, golden crepe and watch it melt just so. It’s my go-to for impressing weekend guests or indulging a spontaneous sweet craving. It’s the kind of recipe that feels fancy but is secretly simple—and I’m here to share the secrets to nailing it every time.
A Tasty Slice of History: The Nutella Crepe Recipe Origin
While crepes have been a French and European staple for centuries, our beloved nutella crepe recipe is a beautiful 20th-century mash-up. In post-war Italy, Pietro Ferrero created Giandujot, a paste of hazelnuts and cocoa to stretch scarce chocolate supplies. This evolved into the spread we know, and when it met the elegant, paper-thin French pancake, a legend was born. It’s the perfect story of culinary innovation: taking something simple (a crepe) and elevating it into pure joy with one genius condiment. This fusion of cultures in a single, folded package is what makes it so special.
Why This Version is the One to Make
What sets this formula apart is its obsessive focus on texture. We’re not just making a crepe; we’re engineering a vehicle for velvety chocolate-hazelnut bliss. The batter rests to relax the gluten, ensuring a delicate, almost lacy crepe that’s tender, not chewy. A whisper of vanilla adds a fragrant backbone, and a precise amount of butter in the pan gives each crepe a subtly crisp, buttery edge. The goal? A delicate wrapper that’s sturdy enough to hold a generous smear of filling without falling apart, creating that perfect contrast of soft, warm crepe and gooey, decadent Nutella.
The Pro-Tip You Can’t Skip
The single most important step is letting your batter rest. I know, the wait is agonizing. I used to skip it, thinking it was an old wives’ tale, until I realized my crepes were slightly tough. Resting for at least 30 minutes (or up to overnight in the fridge) allows the flour to fully hydrate and the bubbles to settle. The result? A much smoother, silkier batter that spreads evenly in the pan and yields a more tender, pliable crepe. It’s the difference between a good snack and a great one. Pour yourself a coffee and be patient—it’s worth it.
How to Serve Your Dreamy Nutella Crepe Recipe
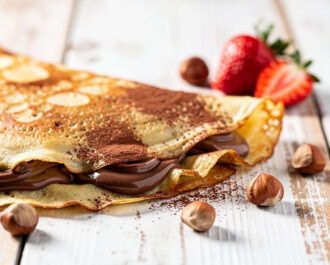
Presentation is part of the pleasure. I love to serve these rolled into tidy cylinders or folded into triangles on a warm plate. A dusting of powdered sugar is classic, but a handful of toasted hazelnuts or fresh raspberries adds wonderful texture and a tart contrast to the sweetness. For a truly over-the-top experience, add a scoop of vanilla bean ice cream. The pairing is divine—the warm crepe starts to melt the ice cream just a little, creating a creamy sauce. A glass of cold milk or a shot of espresso is the perfect beverage companion.
Variations & Swaps to Explore
This master formula is your canvas. For a classic strawberry crepe recipe, swap the Nutella for a layer of sweetened whipped cream and sliced fresh berries. Craving something simple and aromatic? A vanilla crepe recipe with just a sprinkle of cinnamon sugar and a squeeze of lemon is pure, elegant comfort. Feeling whimsical? Channel the wizarding world with a butterbeer crepe recipe—fill your crepes with a butterscotch sauce and top with a dollop of whipped cream “foam.” Dietary needs? Use your favorite gluten-free 1:1 flour blend and a plant-based milk to keep it accessible.
Make-Ahead & Storage Wisdom
These are best served immediately, but you can absolutely get ahead. Cooked, unfilled crepes can be stacked between sheets of parchment paper, wrapped tightly, and refrigerated for 3 days or frozen for a month. Reheat gently in a warm skillet or microwave for a few seconds. You can also make the batter a day ahead and keep it chilled. For a fun brunch, set up a DIY crepe station with the warm crepes, a jar of Nutella, and all the toppings—it’s a guaranteed crowd-pleaser. For more inspiration, check out our recipe collection.
Your Nutella Crepe Questions, Answered
Can I make the batter without a blender? Absolutely! A whisk and a strong arm work perfectly. Just be sure to whisk vigorously until the batter is completely smooth with no lumps.
Why does my first crepe always turn out weird? It’s the “sacrificial crepe” and it happens to everyone! The pan’s temperature and coating aren’t perfectly calibrated yet. Use it as a test to adjust the heat. The second one will be perfect.
What’s the best pan to use? A well-seasoned carbon steel or non-stick crepe pan is ideal, but a small non-stick skillet works great. The key is low, sloped sides for easy flipping. I’ve found excellent technique guides over on Serious Eats.
So, there you have it. Everything you need to master this classic treat. It’s a recipe that rewards a little care and patience with immense, chocolatey joy. Grab your whisk, warm your pan, and get ready to create something truly wonderful. I’d love to hear how yours turn out—share your creations in the comments below!