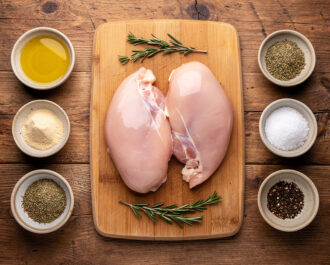
- Prepare the Ingredients

Pat the chicken breasts completely dry with paper towels. In a small bowl, combine the garlic powder, onion powder, dried thyme, dried rosemary, kosher salt, and black pepper.
- Season the Chicken
Place the chicken breasts on a plate or in a shallow dish. Drizzle with the olive oil, rubbing to coat all sides evenly. Sprinkle the seasoning mixture over both sides of each breast, patting gently to help it adhere.
- Bake to Perfection
Preheat your oven to 425°F. Place the seasoned chicken on a rimmed baking sheet or in a baking dish. Bake for 18-22 minutes. If using butter, you can baste the chicken with melted butter halfway through cooking. The chicken is done when an instant-read thermometer inserted into the thickest part reads 160°F.
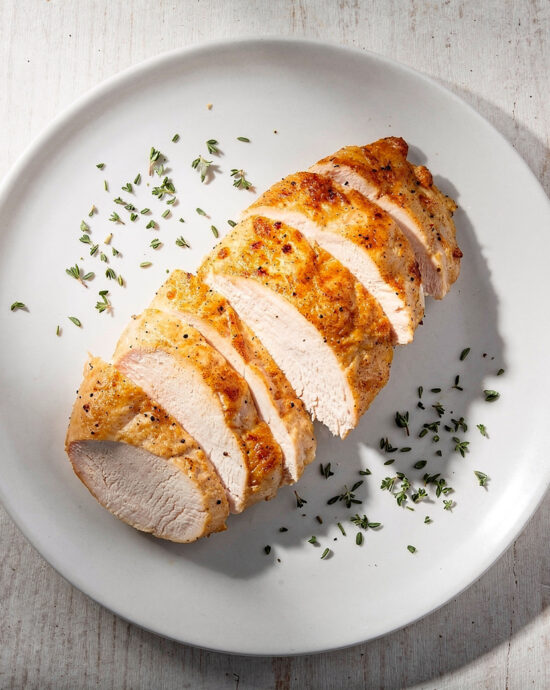
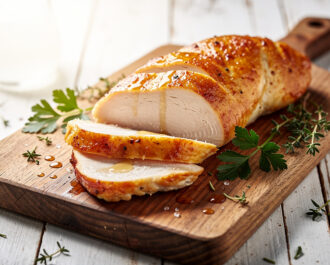
- Rest and Serve
Immediately transfer the cooked chicken to a clean plate or cutting board. Loosely tent it with foil and let it rest for 5-10 minutes. This allows the juices to redistribute and the internal temperature to rise to a safe 165°F. Slice against the grain and serve.
- Calories:230 kcal
- Protein:35 g
- Carbohydrates:1 g
- Sugar:g
- Salt:1.2 g
- Energy:962 kJ
- Fat:9 g
There’s nothing quite as disappointing as a dry, tough chicken breast, is there? I’ve been there, pushing my fork around a plate of chalky poultry, wishing for a do-over. But what if I told you that mastering this staple is easier than you think? The key to the juiciest, most flavorful chicken you’ve ever made lies in one simple question: how long to cook chicken breast in oven. It’s not about a single magic number, but a reliable, temperature-focused method. Once you learn it, you’ll have a simple, healthy protein ready for everything from weeknight salads to impressive dinners.
The Story Behind This Foolproof Method
My quest for the perfect oven-baked chicken breast began in my college apartment, armed with nothing but a basic food thermometer and a stubborn refusal to eat another bland, rubbery cutlet. I read countless articles, experimented with temperatures, and realized the biggest mistake everyone makes is cooking for a set time instead of to a specific temperature. The method I landed on borrows from tried-and-true culinary science, emphasizing a consistent oven environment and the power of a brief rest, ensuring every bite is succulent.
What Makes This Oven-Baked Chicken Breast Special
What sets this technique apart is the texture. We’re aiming for a tender, juicy interior with just the right amount of surface color. The secret flavor profile comes from a simple, all-purpose seasoning blend that creates a savory, slightly herby crust without overpowering the chicken’s natural taste. It’s a blank canvas that welcomes any flavor direction you want to take it.
The One Pro-Tip You Need to Know
My “aha!” moment was embracing the thermometer. A reliable instant-read thermometer is non-negotiable. Pull your chicken from the oven when the thickest part reaches 160°F. Carryover cooking during the rest period will bring it up to the safe and perfect 165°F. This prevents the overcooking that happens when you wait for it to hit 165° in the oven itself. It’s the single most important step for perfect doneness.
Serving & Pairing Ideas
Think beyond just a side of steamed broccoli. This chicken shines sliced over a bright, lemony quinoa salad with roasted vegetables. For a comforting meal, pair it with creamy mashed potatoes and a simple pan sauce made from the drippings. An unoaked Chardonnay or a crisp lager complements it beautifully. For a more complete guide on pan sauces, check out the fantastic resources at Serious Eats.
Variations & Substitutions
This method is incredibly flexible. For a dairy-free option, brush with olive oil instead of butter. Create an Italian vibe with dried oregano, basil, and a squeeze of lemon after baking. A smoky paprika and garlic powder rub gives it a Southwestern kick. For a lower-sodium version, simply reduce the salt and lean more on the herbs and black pepper.
Make-Ahead & Storage Tips
This is a meal-prep superstar. Cook a batch, let it cool completely, and store sliced or whole in an airtight container in the fridge for up to 4 days. It reheats beautifully in a skillet with a splash of broth to keep it moist. You can also freeze cooked, cooled chicken for up to 3 months; thaw overnight in the fridge before using.
Frequently Asked Questions
Can I use bone-in chicken breasts? Absolutely. They will take longer to cook—start checking at the 30-minute mark—but are often even more flavorful and forgiving.
Why is my chicken still dry even when cooked to 165°F? You might be using breasts that are too thin or uneven. Pound them to an even thickness before cooking, or try the “dry brine” method: salt the chicken and let it rest uncovered in the fridge for an hour before cooking.
Do I have to use foil? The foil tent helps trap steam to keep the chicken moist. If you prefer a crisper top, you can leave it off, but be vigilant with your thermometer to prevent drying out.
So, are you ready to banish dry chicken forever? I promise, once you nail down the timing and temperature for how long to cook chicken breast in oven, it will become your most trusted, go-to recipe. Give it a try this week and let me know how it turns out in the comments! And if you’re looking for more inspiration, browse our recipe collection for what to make next.