- Prepare the Ingredients

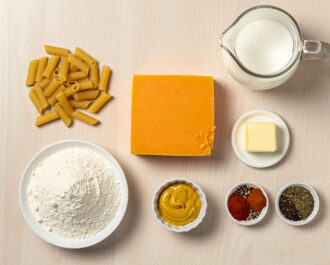
Gather all ingredients: 1 lb gluten-free elbow macaroni, 4 tbsp unsalted butter, 1/4 cup gluten-free all-purpose flour, 3 cups warm whole milk, 1 tsp Dijon mustard, 1/2 tsp garlic powder, 3 cups grated sharp cheddar, 1/2 cup grated Parmesan, 1 tsp salt, 1/2 tsp black pepper, 1/2 cup gluten-free breadcrumbs, and 1 tbsp melted butter for the topping. Preheat your oven to 375°F (190°C) and grease a 9x13 inch baking dish.
- Cook the Pasta & Make the Roux
Bring a large pot of well-salted water to a boil. Cook the gluten-free macaroni for 1-2 minutes less than the package directions for al dente. Drain but do not rinse. Meanwhile, in a large saucepan or Dutch oven, melt the 4 tbsp of butter over medium heat. Whisk in the gluten-free flour and cook, whisking constantly, for about 1-2 minutes until the mixture is bubbly and smells lightly toasted.
- Create the Creamy Cheese Sauce
Remove the roux from the heat. Gradually whisk in the warm milk, ensuring no lumps form. Return the pot to medium heat and cook, whisking frequently, until the sauce thickens enough to coat the back of a spoon, about 5-7 minutes. Remove from heat. Whisk in the Dijon mustard, garlic powder, salt, and pepper. Stir in the grated cheddar and Parmesan cheeses until completely melted and smooth.
- Combine, Top, and Bake
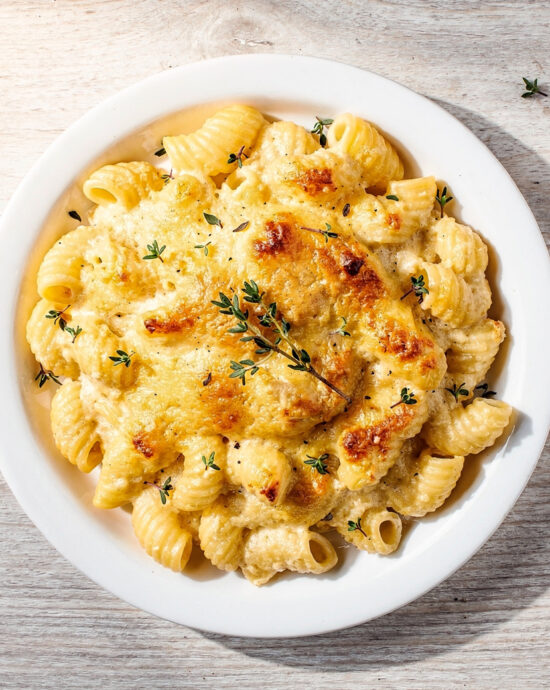
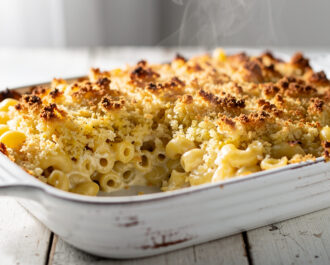
Add the drained, cooked pasta to the cheese sauce and stir until every piece is thoroughly coated. Pour the mixture into the prepared baking dish. In a small bowl, combine the gluten-free breadcrumbs with the 1 tbsp of melted butter. Sprinkle the buttery crumbs evenly over the top. Bake for 20-25 minutes, or until the topping is golden brown and the edges are bubbling vigorously. Let it rest for 5 minutes before serving to allow the sauce to set slightly.
- Calories:520 kcal
- Protein:22 g
- Carbohydrates:52 g
- Sugar:8 g
- Salt:0.9 g
- Energy:2175 kJ
- Fat:26 g
I have a theory that everyone, deep down, has a Mac and Cheese memory. Maybe it was the boxed stuff after soccer practice, or the bubbling dish at a holiday potluck. That craving for pure, velvety comfort is universal. But for a long time, making a truly decadent gluten free mac and cheese that didn’t taste like a compromise felt out of reach. I’m here to tell you—those days are over. This version isn’t an ‘alternative’; it’s the destination.
The Legend of Mac and Cheese (With a Twist)
While Thomas Jefferson gets a lot of credit for popularizing macaroni and cheese in America, the dish has roots stretching back to 13th-century Europe. The basic principle is eternal: starch + creamy fat + heat = happiness. Our journey simply takes a detour around wheat, landing squarely in a world of rich, deeply satisfying flavor and a texture that’s simultaneously tender and delightfully toothsome. This isn’t about missing out; it’s about elevating a classic.
What Makes This Gluten-Free Version Special
The magic here is twofold. First, the sauce. By starting with a simple roux using a high-quality, neutral gluten-free flour (like brown rice or a 1-to-1 blend), we build a sturdy base that can handle a generous amount of aged, sharp cheddar without breaking. The result is a sauce that clings to every noodle in a silky-smooth embrace, not a greasy puddle. Second, the noodle choice matters. I’ve found that corn-and-rice based pasta holds its shape beautifully and has that perfect al dente bite we all crave in a great mac and cheese.
Your Secret Weapon for a Perfect Sauce
Here’s the pro-tip that changed my kitchen life: temper your milk. After you’ve made your roux and it’s gently bubbling, take the pan off the heat. Slowly, slowly whisk in your warm (not cold!) milk. This gradual introduction prevents lumps and shock, ensuring your béchamel base is flawlessly smooth from the get-go. A lumpy sauce is the enemy of good mac and cheese, and this one simple step is your shield.
Serving & Pairing: Think Outside the Casserole
Of course, this dish is a superstar on its own. But let’s play. For a grown-up twist, serve it alongside a simple arugula salad dressed in lemon vinaigrette—the peppery greens and bright acid cut through the richness perfectly. Beer lovers, reach for a crisp, malty lager. Wine drinkers, a buttery Chardonnay is a classic friend. And for the ultimate comfort meal? Pair it with some Serious Eats-inspired crispy oven-baked chicken tenders. Trust me.
Variations to Make It Your Own
The beauty of this base recipe is its flexibility. Need it dairy-free? Use your favorite plant-based butter, milk, and cheeses—just look for ones that melt well. Want to add protein? Fold in some pulled rotisserie chicken or crispy bacon bits. Feeling adventurous? A spoonful of jarred roasted red peppers or a dash of smoked paprika can add a wonderful depth. This creamy masterpiece is your canvas.
Make-Ahead & Storage Wisdom
You can absolutely prep this ahead! Assemble the mac and cheese in its baking dish, cover tightly, and refrigerate for up to a day. Let it sit at room temp for 30 minutes before baking, and you may need to add 5-10 minutes to the cooking time. Leftovers reheat surprisingly well in a covered skillet with a tiny splash of milk to revive the sauciness. They won’t last long, though.
Your Gluten Free Mac and Cheese FAQs
Can I use a different gluten-free pasta? Absolutely. Just be sure to cook it very al dente (a minute or two less than the package says) as it will continue to soften in the hot sauce and oven.
My sauce feels too thick. Help! Easy fix. Simply whisk in a little more warm milk, a tablespoon at a time, until it reaches your desired consistency. Remember, it will thicken slightly as it bakes.
What’s the best cheese blend? I love the sharpness of a good aged white cheddar, but mixing in some Gruyère for nuttiness or Monterey Jack for extra meltiness is always a win.
So there you have it. This isn’t just a recipe; it’s an invitation back to the table, to that familiar, soul-warming comfort, made accessible and absolutely delicious for everyone. I promise, one bite of this gloriously creamy, perfectly cheesy bake, and you’ll forget the word “substitute” ever existed. Now, go preheat that oven. I can’t wait to hear how your version turns out in the comments!