- Prepare the Ingredients

In a large bowl, whisk together the buttermilk, hot sauce, 1 tablespoon of the kosher salt, 1 teaspoon black pepper, 1 teaspoon garlic powder, and 1 teaspoon onion powder. Add the chicken pieces, ensuring they are fully submerged. Cover and refrigerate for at least 4 hours, or preferably overnight. In a separate wide, shallow dish or paper bag, combine the all-purpose flour with the remaining tablespoon of salt, remaining black pepper, remaining garlic powder, remaining onion powder, and the paprika. Whisk thoroughly to combine.
- Dredge the Chicken
Remove the chicken from the buttermilk brine, letting the excess drip off. Working with one piece at a time, place the chicken in the seasoned flour mixture. Shake the dish or gently toss in the bag to coat the piece thoroughly. Press the flour onto the chicken to ensure a good, even layer that will create lots of craggy bits. Place the coated piece on a wire rack set over a baking sheet. Repeat with all chicken pieces. Let the dredged chicken rest on the rack for 15-20 minutes to help the coating set.
- Heat the Oil
While the chicken rests, pour the oil into a large, heavy-bottomed Dutch oven or deep fryer. The oil should be at least 2 inches deep but fill no more than halfway up the pot. Attach a deep-fry or candy thermometer to the side. Heat the oil over medium-high heat until it reaches 350°F. Adjust the heat as needed to maintain this temperature. Have a clean wire rack ready over another baking sheet to drain the finished chicken.
- Fry to Perfection
Carefully lower 3-4 pieces of chicken into the hot oil using tongs, being careful not to overcrowd the pot (this will cause the temperature to drop dramatically). Fry for 12-16 minutes, turning occasionally, until the crust is a deep, golden brown and an instant-read thermometer inserted into the thickest part of a piece (without touching bone) reads 165°F. Maintain the oil temperature between 325°F and 350°F. Transfer the cooked chicken to the wire rack to drain. Let it rest for at least 5 minutes before serving. Repeat with the remaining chicken, allowing the oil to return to 350°F between batches.

- Calories:520 kcal
- Protein:38 g
- Carbohydrates:24 g
- Sugar:3 g
- Salt:1.8 g
- Energy:2180 kJ
- Fat:28 g
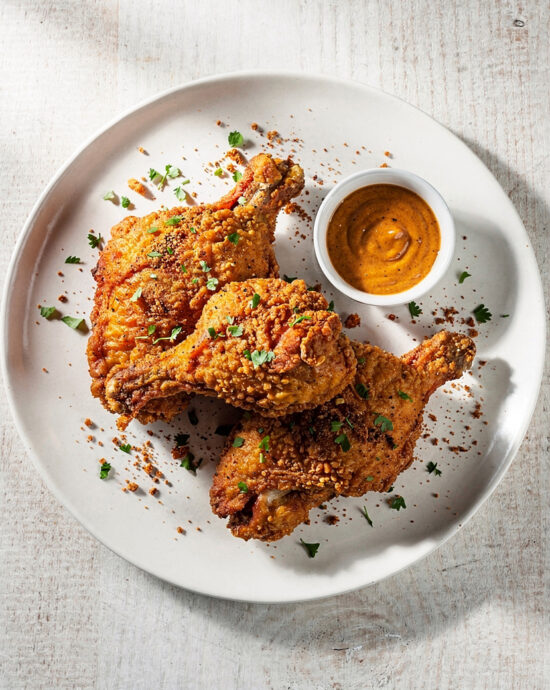
There’s a very specific craving that only proper fried chicken can satisfy. It’s the kind that starts as a distant, nostalgic hum—maybe a memory of a summer picnic or a late-night drive-thru indulgence—and grows until your kitchen *must* smell like peppery flour and sizzling oil. If you’re nodding along, you’re in the right place. This fried chicken recipe is my answer to that deep-seated yearning. It delivers that iconic shatteringly crisp shell guarding impossibly juicy meat, and the best part? It’s surprisingly straightforward to master at home.
The Legend Behind This Fried Chicken Recipe
While the origins of frying chicken are a rich tapestry woven across cultures, the American classic we know and love has a particularly soulful history. It’s a story of ingenuity and celebration, transforming a humble bird into a centerpiece of family gatherings and community resilience. This version pays homage to that legacy with a focus on building flavor from the inside out, ensuring every bite is seasoned through and through, not just on the crust.
Why This Version Works
What makes this method special is a two-part seasoning strategy. First, we brine the chicken in a savory buttermilk bath. This step is non-negotiable—it’s the secret to moisture that persists through the fry. Second, the dredging flour is seasoned almost as aggressively as the brine. The result is a crust with a bold, peppery personality that clings tenaciously to the meat, creating that perfect textural contrast we all chase.
The Pro-Tip: Temperature is Everything
My single biggest piece of advice? Use a thermometer. I used to wing it, resulting in greasy, undercooked, or burnt chicken. No more. Frying at a steady 325°F to 350°F is the golden rule. The oil is hot enough to seal the crust quickly, preventing oil absorption, but gentle enough to cook the meat through without burning the exterior. A good read on this science can be found over at Serious Eats.
Serving & Pairing Your Perfect Fried Chicken
This dish is a glorious centerpiece. For a classic spread, pair it with creamy potato salad, tangy collard greens, and fluffy biscuits. Want to shake things up? Try it with a bright, vinegary cucumber salad to cut the richness, or piled on a waffle for a sweet-savory brunch. A crisp, cold lager or an off-dry cider are my drink pairings of choice—they’re like a flavor fire extinguisher for all that deliciousness.
Variations & Substitutions
Need a gluten-free version? Swap the all-purpose flour for a 1:1 gluten-free blend—the results are stellar. For a dairy-free option, use unsweetened almond milk mixed with a tablespoon of lemon juice or vinegar instead of buttermilk. And if you’re craving heat, add a tablespoon of cayenne or smoked paprika to the flour mix for a spicy kick.
Make-Ahead & Storage Tips
You can brine the chicken overnight for deeper flavor. The seasoned flour can also be mixed a day ahead. Leftovers? They reheat beautifully in a 375°F oven for about 15 minutes to re-crisp. For longer storage, let the cooked chicken cool completely, then freeze on a baking sheet before transferring to a freezer bag for up to 3 months. Reheat from frozen in the oven.
Frequently Asked Questions
Can I use boneless, skinless chicken? You can, but you’ll sacrifice some juiciness and that classic crispy skin texture. For the full experience, bone-in, skin-on is the way to go.
What’s the best oil for frying? Use a neutral oil with a high smoke point. Peanut, vegetable, or canola oil are all excellent, affordable choices.
I hope this guide gives you the confidence to create your new go-to fried chicken recipe. There’s something incredibly rewarding about mastering this iconic dish in your own kitchen. So, tie on your apron, heat that oil, and get ready for some seriously good eating. I’d love to hear how yours turns out—share your stories and photos in the comments! For more kitchen adventures, browse our recipe collection.