- Prepare the Ingredients

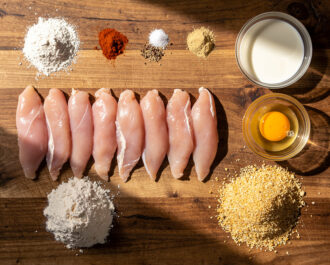
Gather all ingredients: 1.5 lb chicken breasts, 1 cup flour, 1 tsp garlic powder, 1 tsp paprika, 1 tsp kosher salt, 0.5 tsp black pepper, 1 cup buttermilk, 1 large egg, 1.5 cups panko breadcrumbs, and 2 cups neutral oil. Cut the chicken breasts into even strips, about 3/4-inch thick. In a shallow bowl, mix the flour, garlic powder, paprika, salt, and pepper. In another bowl, whisk the buttermilk and egg together. Place the panko in a third shallow bowl. Set up a wire rack over a baking sheet.
- Dredge and Bread the Chicken
Working with one piece at a time, coat a chicken strip thoroughly in the seasoned flour mixture, shaking off any excess. Next, dip it into the buttermilk-egg mixture, letting the excess drip back into the bowl. Finally, press the strip firmly into the panko breadcrumbs, coating all sides evenly. Transfer the breaded strip to the wire rack. Repeat with all remaining pieces.
- Let the Coating Set
This is the crucial resting step. Let the breaded chicken strips sit on the wire rack at room temperature for 10-15 minutes. This allows the coating to hydrate and adhere, which prevents it from falling off during frying and ensures maximum crispiness.
- Fry to Golden Perfection
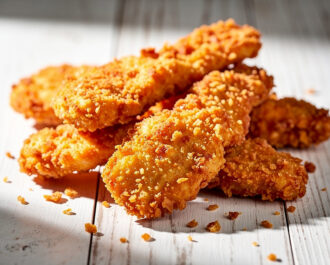
In a large, heavy pot or Dutch oven, heat the oil over medium-high heat to 350°F (175°C). Carefully add the chicken strips in batches, avoiding overcrowding. Fry for 3-4 minutes per side, until deeply golden brown and crispy. The internal temperature should reach 165°F (74°C). Transfer cooked strips to a clean wire rack set over a paper towel-lined tray to drain.
- Serve Immediately
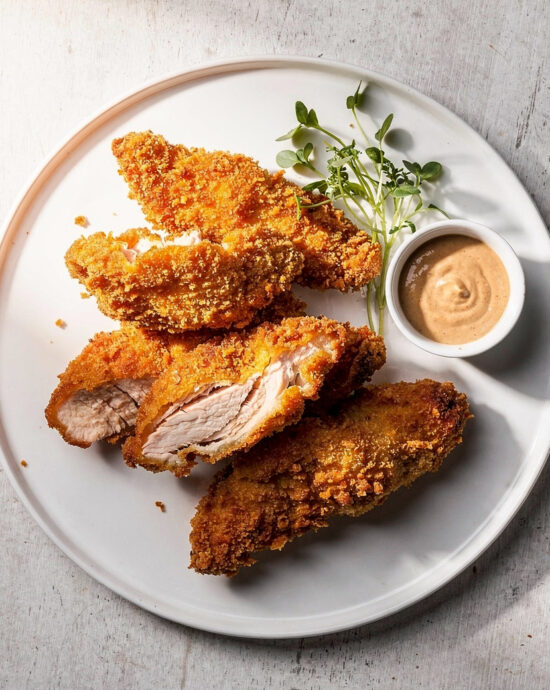
Serve the hot, crispy chicken strips immediately with your favorite dipping sauces. They are best enjoyed right away while the crust is at its peak texture.
- Calories:420 kcal
- Protein:38 g
- Carbohydrates:28 g
- Sugar:3 g
- Salt:0.8 g
- Energy:1757 kJ
- Fat:16 g
There is a primal, deeply satisfying crunch when you bite into a perfectly cooked **chicken strip**. It’s the sound of a promise kept—a crispy, golden-brown exterior giving way to tender, flavorful chicken inside. Yet, we’ve all known the heartbreak of a soggy coating or a dry interior. That’s why I spent an embarrassing amount of time perfecting this approach, which guarantees a stellar result, whether you’re feeding a crowd of hungry kids or treating yourself to a proper grown-up version. The magic lies not in one big secret, but in a few small, crucial steps that anyone can master.
A Quick Dip into the History of Chicken Strips
While breaded poultry is a global tradition, the **chicken strip**, as we know it, is a distinctly American invention born in the post-war convenience food boom. One legend points to a restaurant in Tennessee in the 1970s, where a chef supposedly cut up chicken breasts to serve a child who wouldn’t eat a whole piece. The result was a runaway hit. While the veracity of that tale is debated, it’s a story that fits: this dish is about comfort, accessibility, and pure, uncomplicated joy. It’s food that brings people together around a shared plate, no fancy utensils required.
Why This Method Works So Well
What makes these breaded beauties special is a double-dredge system. First, the flour creates a dry foundation. The buttermilk bath, seasoned with paprika and garlic powder, adds tang and moisture. The second flour coating then locks all that flavor in and creates a craggy, textured surface that clings to the crumbs, leading to maximum crunch. It’s a simple one-two punch that elevates them from mere fast-food facsimiles to something truly crave-worthy.
The One Pro-Tip You Absolutely Need for Chicken Strips
Here’s the non-negotiable rule: let them rest. After breading, arrange your strips on a wire rack set over a baking sheet and let them sit for 10-15 minutes before frying. This allows the coating to hydrate and adhere properly, which prevents it from sloughing off in the hot oil. It’s the difference between a flawless, intact crust and a patchy, disappointing one. I learned this the hard way after a few messy, frustrating batches—now it’s my kitchen commandment.
Serving & Pairing Ideas Beyond the Dipping Sauce
Of course, you’ll need dipping sauces. A classic honey mustard is divine, or a spicy sriracha mayo for a kick. But think beyond the ramekin. Toss them in a Buffalo sauce and pile them on a salad for a hearty lunch. Or, serve them alongside a bright, vinegar-based slaw to cut through the richness. For a drink pairing, a cold lager works, but I’m partial to a tart lemonade or even a dry rosé—the acidity is a brilliant foil to the savory, fried goodness.
Variations & Substitutions for Every Diet
Need a gluten-free version? Swap the all-purpose flour for a 1:1 gluten-free blend and use gluten-free panko. For a dairy-free option, unsweetened almond milk with a squeeze of lemon works in place of buttermilk. Want more heat? Add a teaspoon of cayenne pepper to the flour mixture. You could even bake these on an oiled rack at 425°F for 20-25 minutes, flipping halfway, for a lighter, still-crispy finish. The method is adaptable.
Make-Ahead & Storage Tips for Smart Cooks
You can bread the strips and keep them on that wire rack in the fridge, uncovered, for up to 2 hours before frying—this actually helps further dry the surface for extra crispness. Leftovers? Reheat them in a 375°F oven or air fryer for 5-7 minutes to revive the crunch. They won’t be quite as perfect as fresh, but they’ll beat any microwaved version by a country mile.
Frequently Asked Questions
Can I use chicken tenderloins instead of cutting breasts? Absolutely! Tenderloins are perfect and require no trimming.
What’s the best oil for frying? A neutral oil with a high smoke point, like canola or vegetable oil, is ideal.
How do I know when they’re done? They should be deeply golden brown and register 165°F on an instant-read thermometer.
So, ready to make your kitchen smell incredible? This recipe delivers that iconic crunch and juicy interior we all dream of. It’s a technique that builds confidence. For more brilliant explorations of cooking science and technique, I always turn to the experts at Serious Eats. Now, go forth and fry! I’d love to hear how yours turn out—tag me or drop a comment below. Happy cooking!