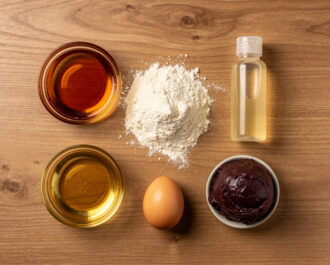
- Prepare the Ingredients

Gather all your ingredients: 2 cups all-purpose flour, 1/2 cup golden syrup, 1/4 cup vegetable oil, 1 tsp lye water (or dark soy sauce), 14 oz sweet red bean paste, 1 large egg yolk, 1 tbsp milk or water, and 1 tsp toasted sesame seeds (optional). This ensures you have everything measured and ready before you start mixing.
- Make & Rest the Dough
In a large bowl, whisk together the golden syrup, vegetable oil, and lye water until emulsified. Gradually stir in the flour until a shaggy dough forms. Turn it out onto a clean surface and knead gently for 2-3 minutes until smooth. Wrap the dough tightly in plastic wrap and let it rest at room temperature for at least 1 hour (or overnight in the fridge). This resting period is crucial for a pliable, easy-to-work dough.
- Shape & Fill the Mooncakes
Divide the rested dough into 8 equal pieces (about 40g each). Divide the red bean paste into 8 equal portions (about 50g each). Roll a dough piece into a ball, then flatten it into a 4-inch disc in your palm. Place a bean paste ball in the center, then carefully wrap the dough around it, pinching the seams to seal completely. Roll the sealed ball gently between your palms to smooth it out.
- Stamp & Bake to Perfection
Lightly dust a mooncake mold with flour and tap out the excess. Place your filled dough ball into the mold, seam-side up. Press down firmly on the plunger to stamp the design, then gently release the mooncake onto a parchment-lined baking sheet. Repeat with remaining dough and filling. Whisk the egg yolk with 1 tbsp milk for the egg wash. Brush the tops of each pastry lightly with the wash. Bake in a preheated 350°F oven for 15-20 minutes, until the crust is golden brown and firm.
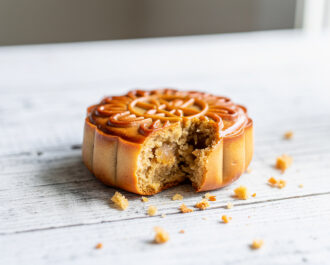
- Cool & Serve
Let the baked mooncakes cool completely on the baking sheet. They will be hard straight from the oven. Transfer them to an airtight container and let them rest at room temperature for 1-2 days to allow the crust to soften and become beautifully chewy—this is the "returning oil" stage. Slice thinly and serve with tea.
- Calories:290 kcal
- Protein:4 g
- Carbohydrates:45 g
- Sugar:22 g
- Salt:0.1 g
- Energy:1210 kJ
- Fat:10 g
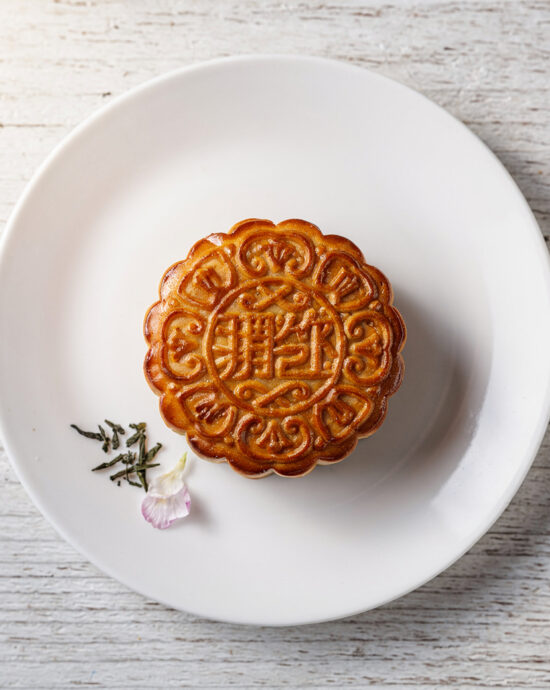
My journey to mastering a mooncake began with a slightly stale store-bought version and a deep yearning for the dense, satisfyingly chewy texture and sweet, nutty warmth I remembered from childhood celebrations. This classic mooncake recipe, with its velvety red bean paste encased in a glossy, tender crust, is my solution—a project that feels celebratory, not intimidating. Trust me, your first homemade creation will taste like a festival in your hand.
The Legend of a Mooncake
While the exact origin of the mooncake is steeped in legend, the most popular story whispers of secret messages baked inside pastries to coordinate a rebellion against Mongol rule in 14th-century China. The pastries were distributed during the Mid-Autumn Festival, a time for family reunions and moon-gazing, and the tradition stuck. Today, giving and sharing these treats symbolizes unity and good fortune.
Building the Perfect Lunar Pastry
What sets a great mooncake apart is its elegant balance. The dough, often made with golden syrup and lye water for its signature color and texture, should be supple but not sticky. The real star, however, is the filling. Traditional lotus seed paste or sweet red bean paste are classics for a reason, offering a dense, fragrant counterpoint to the crust.
The Pro-Tip: Mastering Mooncake Dough
Here’s your non-negotiable secret: rest your dough. After mixing, wrap it tightly and let it rest at room temperature for at least an hour, or preferably overnight in the fridge. This allows the flour to fully hydrate and the gluten to relax, making it infinitely easier to roll out and wrap around your filling without tearing. For those wary of lye water, you can achieve a beautiful color with a touch of dark soy sauce or simply embrace a paler, golden crust.
Serving & Pairing Ideas
Serve your mooncake at room temperature, thinly sliced alongside a pot of robust, slightly bitter tea like pu-erh or oolong to cut through the sweetness. For a truly indulgent treat, pair a small piece with a scoop of smooth coconut or black sesame ice cream. They are rich, so small portions are key.
Variations & Substitutions Galore
The beauty of this treat is its endless adaptability. For a vegan mooncake, use vegetable oil and ensure your bean paste is made without lard. Love chocolate? A chocolate mooncake filling made with melted dark chocolate mixed into the paste is divine. Craving something less traditional? Try mung bean paste, mixed nuts, or even a tangy cream cheese mooncake filling. If molds intimidate you, a our recipe collection for mooncake recipe without mold uses simple cookie cutters for a charming, rustic look.
Make-Ahead & Storage Tips
Mooncakes improve with a little patience! After baking and cooling, store them in an airtight container at room temperature for 1-2 days to allow the crust to soften—a process called “returning oil” that yields the perfect chewy texture. They freeze beautifully for up to 3 months; just thaw at room temperature.
Frequently Asked Questions
Can I make mooncakes gluten-free? Absolutely! Use a 1:1 gluten-free flour blend for the crust. Just note the texture may be slightly more crumbly, but the flavor will still be wonderful.
What’s the difference between snow skin and baked mooncakes? Snow skin mooncakes, popular for their chewy, mochi-like skin, are a no-bake, modern variant often served chilled, while traditional baked mooncakes have a firmer, pastry-like crust.
Can I skip the salted egg yolk? Of course! Many modern recipes, including this easy mooncake recipe, offer mooncake without egg yolk. Simply use an extra spoonful of your chosen paste.
So, what are you waiting for? Roll up your sleeves and create your own piece of lunar magic. The process is a meditation, and the reward—a perfectly formed, deeply satisfying pastry—is worth every minute. I’d love to hear how your mooncake adventure turns out in the comments below! And for more fascinating deep-dives into culinary science and technique, check out the wonderful folks at Serious Eats.